Creating a Digital Rubric with Google Forms and autoCrat
Providing valuable feedback to students in a timely manner can be a challenge. The more time that passes between an assignment's submission and the teacher's feedback, the less meaningful that feedback becomes.
Since I'm all about using digital tools to increase productivity, I embarked on quest to enhance the efficiency of my grading process. Not surprisingly, there are a variety of digital tools out there to help with this. Autocrat is one of them.
WHY AUTOCRAT?
AutoCrat is a Google add-on that automates the creation and sharing of digital documents via Google Form Submissions. Teachers can use this versatile tool to create a digital rubric in Google Forms, generating a Google Doc or PDF that automatically shares with students in Google Drive.
Like any Google Form, submission results are stored in a master Google Sheet for quick reference at any time. This helps teachers streamline their grading system while providing students with quick, efficient and organized feedback in the process.
Getting Started with autoCrat
To get started with autoCrat, you'll need a few things first.
1. The autoCrat add-on for Google Sheets. Click "Add-ons" —> "Get add-ons" on the file menu in Google Sheets. You only have to do this once.
2. A Google Form rubric. More on that in a minute.
3. A Google Doc template that corresponds with your Google Form. Also more on that in a minute.
4. The RosterSync add-on for Google Sheets (optional, but recommended if you use Google Classroom).
The Google Form Rubric
Gathering student emails
autoCrat works by creating a Google Doc (based on your pre-made template) from your Google Form submissions. This new document will automatically share with students in their Google Drive. This means you'll need to include the email addresses of your students' Google accounts on your Form; otherwise, autoCrat will have nowhere to send the files.
If you use Google Classroom, I recommend the Google Sheets add-on RosterSync to create a spreadsheet of your students' email addresses. You can then copy and paste all emails at once into your Google Form. On your spreadsheet, simply Ctrl+A then Ctrl + C to highlight and copy all emails. Then, in Forms, place your cursor on the first option line and paste (Ctrl + V). This should paste all emails in one fell swoop, rather than having to individually copy and paste each address.
If you don't use Google Classroom, you'll have to find a different way to gather your students' emails in advance. You could have them fill out a quick Google Form at the beginning of the year. This way you'll still have their emails in a spreadsheet, and you can copy/paste them into your Form when needed.
I recommend using the "Dropdown" option in Forms so the emails don't take up too much space on your completed Form.
Note: Because my students' email addresses contain a portion of their name, I do not include a separate category for their real names because I already know who's who. If your student emails are something like an ID number, you'll need to include a section to select their full names as well. Most learning management platforms have an option to export a roster to Excel, so you can still use the copy/paste trick to save time.

Creating the rubric
Create the Google Form using your rubric categories in the heading/question area. These categories will need to align with the Google Doc template you create later. For the point values, I recommend using the "Multiple Choice" option (The "Dropdown" option is an extra click, we don't have time for extra clicks!)
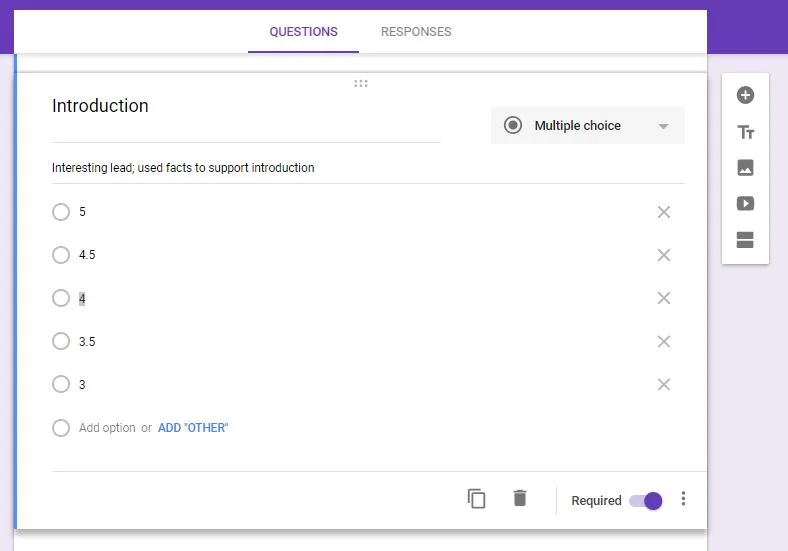
Notice in the photo above, I have a rubric category titled "Introduction." The remainder of my rubric looks identical, but with different categories for each area I want to assess (Body, Conclusion, etc). If you don't see an area to add a description, you can add one by clicking those three little dots in the bottom right corner.
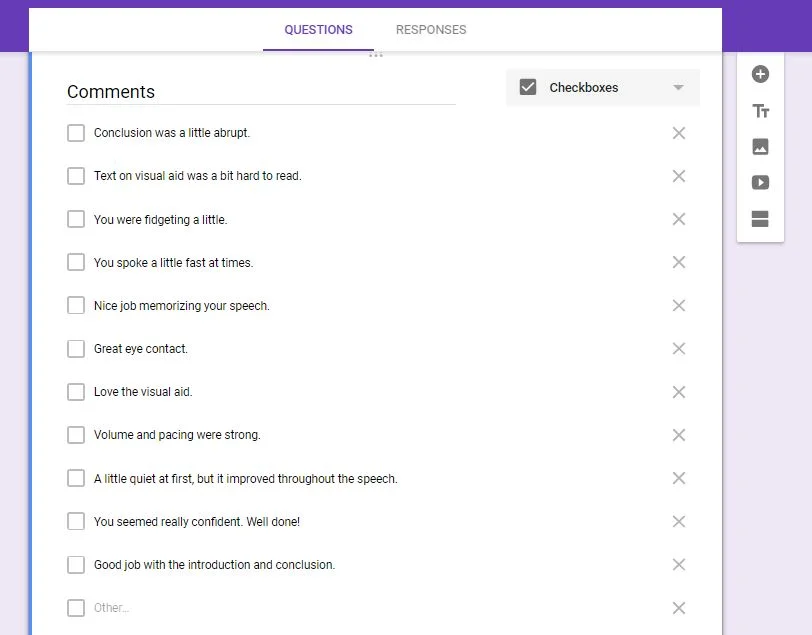
In the photo below, you'll see I also include a generic "Comments" category using the "Checkboxes" selection. I list commonly-used feedback here to save time, while also adding an "Other" option for more personalized feedback.
The Google Doc Template
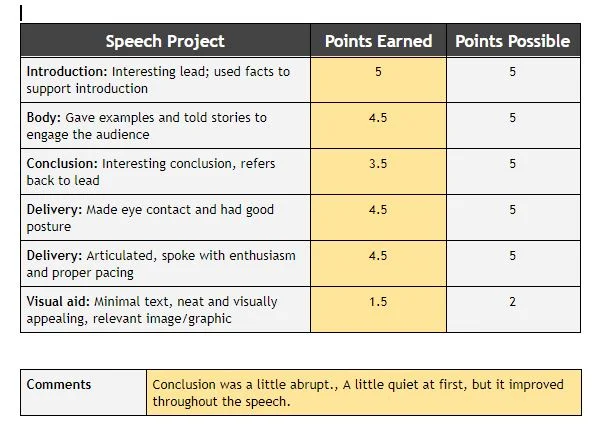
Once you are happy with the rubric you've created in Google Forms, you'll need to create a corresponding template in Google Docs. You can design the rubric to look however you want. Below, you'll see a sample of one of mine.
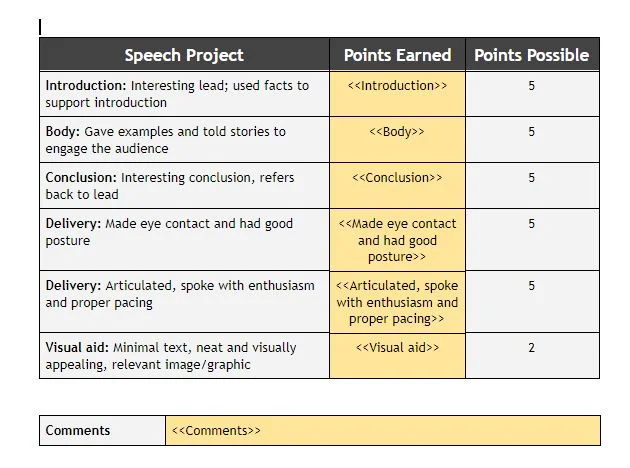
Notice the angle brackets and words/phrases underneath the "Points Earned" category above. These are called tags. Tags are what autoCrat uses to merge the data from your Google Form to your template. These are case-sensitive and must be IDENTICAL to your Google Form categories. I recommend just copy and pasting the text from your Form to this Doc to ensure everything aligns properly.
This doc is basically what students will see when they check their Google Drive for your feedback, except the score you select for them on your Form will replace the angle-bracket tags.
Launching AutoCrat
Once you have your Form and Doc ready, you can configure autoCrat to run your job.
Step 1: Begin job in Google Sheets
Open the Google Sheet that corresponds with your Form: In the Responses section of your Form, click the green square that says "View responses in Sheets" — this will open the Google Sheet where all your responses are stored.
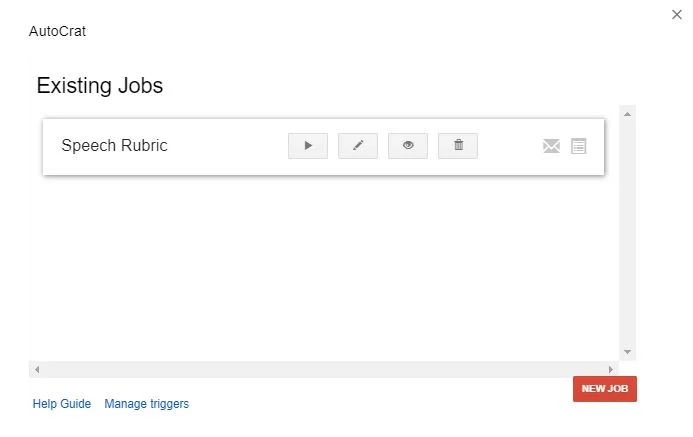
In the File menu of this Google Sheet, click "Add-on" —> "AutoCrat" —> "Open" and give your job a name.
Step 2: Select Google Doc template
autoCrat will ask you to select a template. Select the Doc template you created earlier from your Drive. Click Next.

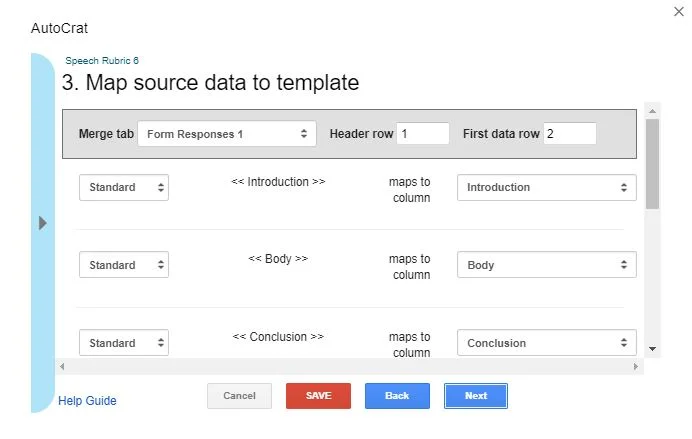
Step 3: Map source data
Now autoCrat has taken the data from your Form and mapped it to your Doc. Do a quick double check to make sure everything mapped correctly. If you're experiencing issues here, make sure that your tags are IDENTICAL to your Google Form categories. Remember, they are case sensitive! If everything looks good, click Next.
Step 4. Choose file settings
This is where you tell autoCrat what type of file to create and how to name each file. I like to use the << name >> tag in the filename so that it populates with each student's name when shared.
For our purposes (creating a digital rubric), we'll be using Multiple output mode. It should be selected by default. This means that autoCrat will create an individual Doc for each Form submission, rather than one doc for all Form submissions.

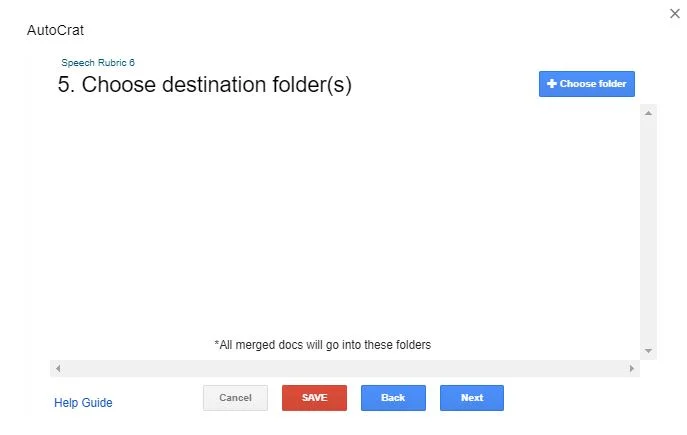
Step 5. Choose destination folder
Choose a folder in your Drive where all merged Docs will be sent. Each Doc will be shared with the student, but you'll receive a copy in your Drive as well. You may want to create a new folder for this.
Steps 6 & 7: Skip.
Nothing to see here. Moving along.
Step 8. Configure document sharing and email settings.
In addition to sharing the Doc in Google Drive, autoCrat can email students the results as well. My students DO NOT have email associated with their Google Drive accounts (a bummer, I know) so I select "Yes" to "Send from generic no-reply address." This way I don't get a bunch of email bouncebacks. I still fill out the email section below though because autoCrat doesn't let me proceed without it. If your students DO have access to email, filling this out will dictate what your students see in that notification email. You can use the tags here as well.

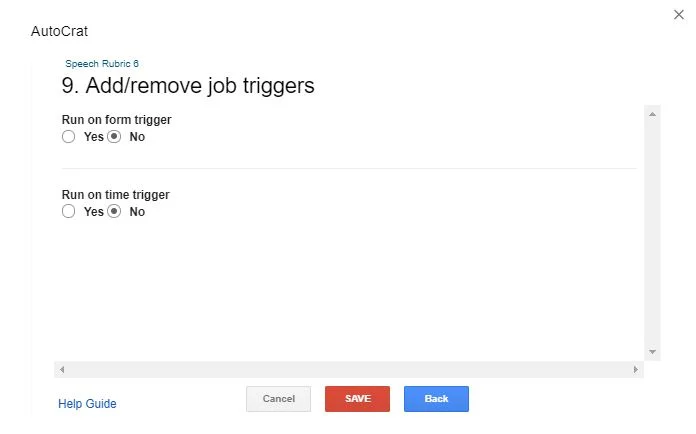
Step 9: Choose job triggers
This is where you select how and when autoCrat will share the rubric with students.
"Run on form trigger" means that autoCrat will create and share each Doc upon Form submission. So as soon as you click Submit on your Google Form, your feedback is immediately sent to each student in Google Drive.
"Run on time trigger" means autoCrat will create and share each Doc at a designated time — perhaps at the end of the school day or the following day.
If you'd prefer to run the job manually, meaning you want to manually give the order for autoCrat to run, select "No" for both of these options. I'll show you how to run the job manually next.
After you make your selections, then click Save.
Step 10: Finishing up and/or running job manually
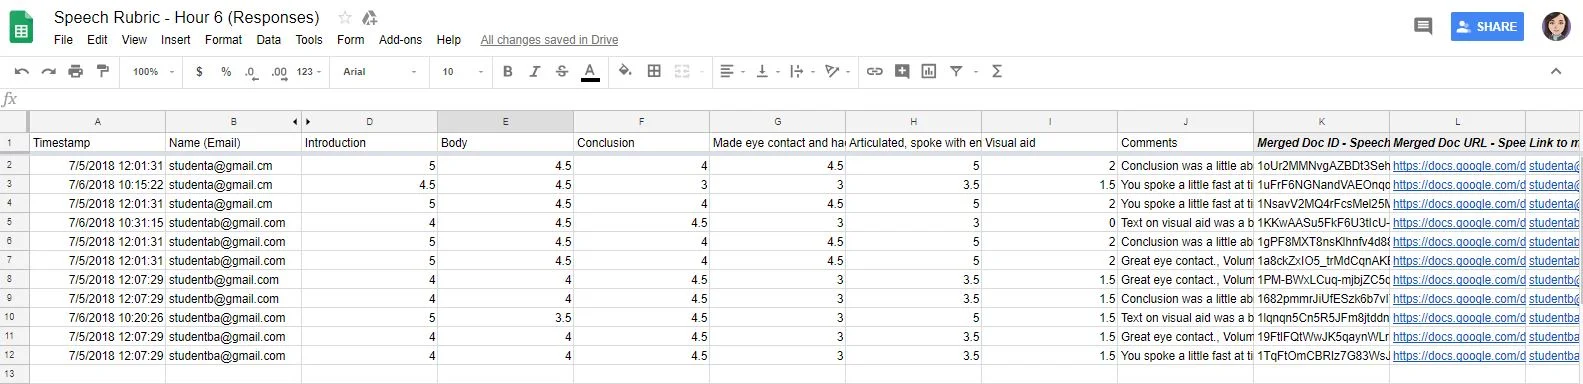
AutoCrat will run according to the settings you selected in Step 9. Once autoCrat has run, you'll see a series of new columns to the right of your scores in Google Sheets. These columns contain the links to each individual rubric that autoCrat created. Under "Merged Doc URL", you can click on those links and it should take you directly to the Google Doc that has been shared with that particular student.
If you directed autoCrat to run on a form or time trigger in Step 9, this will happen automatically based on your selected trigger.
If you selected "No" for both options in Step 9, you will have to tell autoCrat to run your job manually. After you've scored all students and are ready to send out the rubrics, click "Add-on" —> "autoCrat" —> "Open" in the File menu of your Google Sheet. This will open your existing jobs in autoCrat. Click that first button that looks like the standard "Play" icon (the sideways triangle). If you hover your cursor over it, you'll see it says, "Run job." Once you click, AutoCrat will begin creating and sharing the rubrics. Again, you'll know autoCrat has worked when you see the newly-added Merged Doc URL column in your Google Sheet.
Step 11: Calculating final scores (optional)
One of the many reasons I love having my rubric scores in Google Sheets is because I'm only a quick formula away from calculating students' total scores and percentages. If you need to put a final grade in the gradebook, adding up points manually can take up precious time and energy. Google Sheets to the rescue.
1. Create a new blank column next to the student emails.
2. Click in the first cell of the new column, then click the file menu “Insert” → “Function” → “SUM” or just manually type =SUM(
3. Click on the cells you want to add (to highlight multiple cells quickly, click the first cell, use the shift key and then click the final cell). The "Enter" key will close the formula, so it will look something like this: =SUM(G2:K2). This will add all rubric categories to give you the total points students received.
4. If you want a final percentage, add the / key after the parenthesis to divide by the number of points total. Click the percentage icon to convert this to a percentage, and eliminate the decimals with the adjacent icons for a cleaner look.
5. To apply your new formula to all cells in that column, click on the cell once and drag the blue square in the corner all the way down.
The end
Okay, I know that was a lot. autoCrat is definitely one of those tools that takes some getting used to. But I promise you, it's worth the initial time investment.
You'll love having all your scores in one spreadsheet that you can reference from any device, and students will love receiving quick and organized feedback sent right to their Google Drive. It's also worth mentioning that there are many other uses for autoCrat other than as a digital rubric, but that's a different post for a different day.
To help you get started, below you’ll find a sample Google Form rubric and corresponding Google Doc template. You may copy and modify these documents as needed.
Click here to make a copy of my Google Form rubric
Click here to make a copy of my Google Docs rubric template