What’s the Point of a Bitmoji Classroom? All Your Questions, Answered.
Since publishing my virtual Bitmoji classroom tutorial in April 2020, I’ve received hundreds of questions through comments, email and social media. This post will attempt to answer some of your most frequently asked questions.
Please make sure to read through each of the headings/subheadings before posting your question in the comments. Thanks!
1. What’s the point of a Bitmoji classroom?
Here’s my answer for well-intentioned folks looking for the rationale behind a hot new trend: There are a lot of reasons why someone might create a virtual classroom, but the short answer is that virtual classrooms can be a fun, visual way to display information for students. Scroll to the next question for some specific ideas.
For snarkier folks who follow up this question with some form of, “Are they actually functional, or are they just cute and trendy?” — here’s my answer:
Yes, they’re functional — and yes, they’re cute and trendy too. Something can be cute and functional at the same time. Moving on.
2. How do I use a Bitmoji classroom?


Daily Agenda Slides: Write an overview of each day’s assignments on your classroom’s whiteboard. This gives students a single source to reference each day without having to scroll through the Stream or Classwork page. You can even link specific Google Classroom assignments so that when students click the link, it takes them to that specific assignment. I’ve been using daily agenda slides for years (not always the Bitmoji kind, but still), and my students have said they really appreciate having all the information for each day in one place. If you want to check out some of my non-Bitmoji Daily Agenda templates, click here.
Virtual Library: Add links to book talks and read-alouds, along with other library resources such as your library catalog, Google Scholar, and more.
Class Resource Hub: Link important class information and resources, such as your syllabus, frequently accessed resources, etc.
Google Meet or Zoom waiting screen: Display important reminders, attendance questions or an overview of the virtual class period at the beginning of your virtual classes. Open your slides in Presentation mode (Ctrl + F5) and present your screen so that students see it as they enter. You could also use it to announce office hours as seen in the example above.
Important Announcements: Writing important announcements on your virtual classroom whiteboard is a great way to call attention to need-to-know info for students.
3. how do i create a bitmoji classroom?
It’s actually surprisingly simple! Click here to view my step-by-step tutorial.
4. How do I share my Bitmoji classroom with students?
The answer to this depends on the type of classroom you’ve created, what your intended purpose is, and what platforms you have access to. Below are a few suggestions grouped by platform:
▪️ Google Classroom ▪️
Post the slides to Google Classroom as a Material and keep them at the top of your Classwork page. Or, you could post them to the Stream (as long as you have your assignment notifications turned off so things don’t get too cluttered in there).
Personally, I always post them using the Google Drive attachments so they open up in Google Slides; however, lots of people seem to prefer posting a “Preview” link so it opens in a view that looks more like presentation mode. If you’d prefer to go this route, make sure your slides are set to ‘Anyone with the link can view” and change the end of the link where it says /edit to /preview.
▪️ Google Sites ▪️
Embed the Google Slides presentation by clicking Insert —> then selecting the type of file you want to add.
▪️ Schoology ▪️
Embed the Slides presentation at the top of the Materials page. Click here for a helpful video video tutorial by Tim Wheeler.
▪️ Canvas ▪️
Add a new page and embed the slideshow onto that page. Here’s a helpful tutorial by Gina Brown.
Please know that I am not an expert in Canvas or Schoology, so I will not be able to help with specific questions about those platforms. I linked two helpful tutorials above, and I recommend searching YouTube for additional videos if you have additional questions. There are tons!
5. How do I share my virtual classroom in Presentation mode?
Technically, you can’t. However, you can share your slides in “Preview mode” — which is almost the same thing. Preview mode will not take up the entire screen in the same way presenting your slides will, but it will definitely give your virtual classroom some additional screen real estate.
To share your virtual classroom in preview mode, grab the Shareable link or embed code. Then, change the end of the URL where it says /edit to /preview.
To share your virtual classroom without the black presenter bar at the bottom, change the end of the link from /edit to /present?rm=minimal.
6. How do I prevent students from moving objects around?
When you share your virtual classroom, make sure to set the link sharing permissions to “Anyone with the link can view.” To do this, click the share button in the top right corner of the slides. This will prevent students from moving your objects because they won’t have editing rights.
📌 Tip: If you test the link on your own Google account, it’s going to look like students can edit because YOU have editing rights. If you’ve set your link sharing permissions correctly, you should be fine, but I always test my links in Incognito Mode to be sure. To open an Incognito window, click the three dots in the top right corner of Google Chrome and select “New incognito window”
If you post on Google Classroom, you’ll have the option to post it as a Material (which automatically posts as View Only), or as an assignment attachment. The default for assignment attachments is View Only. To learn more about file sharing permissions in Google Classroom, click here.
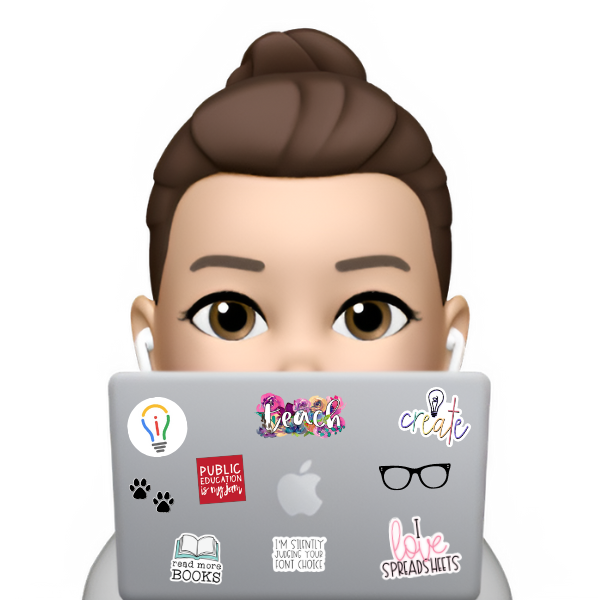
8. Do I have to use my Bitmoji?
No. If Bitmoji isn’t your thing, consider adding a real photo of yourself instead. Use the remove.bg website to remove the background on any photo and replace it with a transparent one.
9. How do I make sure my Bitmoji classroom is accessible for all students?
Good question! To help make sure I cover all the bases here, I consulted with my pal Kristi, an EL Instructional Support Specialist. Here are a few things to consider:
▪️ USE alt text ▪️
Adding alt text helps screen readers identify the images on your slide. This is especially important if you’ve created a resource hub with clickable links. To add alt text, select an image -> right click —> alt text.
▪️ Have a clear organizational strategy ▪️
Unless you’re doing some type of scavenger hunt where randomness is the goal, be sure to consider the way your page is organized. You want to make sure there’s a clear organizational pattern and that your links and objects are positioned with intention. If all of your links are on a bookshelf, for example, adding another link somewhere else might be confusing for students.
▪️ Add audio ▪️
If your virtual classroom is interactive, consider using a voice or screen recorder to record yourself navigating the slides. This helps students get to know your virtual space and shows them where to find everything when they need it. It’s also a fun way for students to hear your voice if you’re starting the year virtually!
▪️ keep it simple ▪️
Although it’s tempting to add #allthethings to your virtual classroom, it’s best to keep things simple. If you have too many links or visual components, things may go unnoticed and your kids may feel overwhelmed. Remember, less is more.
▪️ Consider file size ▪️
If your virtual classroom contains a lot of images, you may want to consider flattening your images to the background before sharing it with students. I’ll explain how to do this in a minute, but first let’s talk about why file size matters.
In general, larger file sizes take longer to load. If a file takes a long time to load, it’s not going to be very practical to use on a regular basis. Downloading large files also takes up more bandwidth. Bandwidth is a term that refers to the maximum data transfer rate of an Internet connection. In other words, there’s only so much information a network connection can process at a given time, so consistently accessing larger files may cause delays not just for the student, but for their entire household.
If your virtual classroom only has a handful of images, you’re probably fine. But if your scene consists of dozens of images, you’ll want to reduce the file size by flattening your image as much as possible. To do this, make a copy of your Google Slides by going to File —> Make a Copy. This will preserve your slideshow images in case you want to make changes later. If you forget this step, that’s fine — there’s always revision history.
In the new file, go to to File —> Download —> PNG image. This will save your slide as an image file. Then, you’ll insert that image file into the background of your Google Slides. If you have any links on your slides, you’ll want to remove those first. You can do this all at once by holding down the Shift key while you highlight each link. Then cut (ctrl + x) and paste (ctrl +v) your links after you’ve added the image background.
10. I don’t have Snapchat. Can I still make a Bitmoji?
Yes! All you need to create a Bitmoji is the Bitmoji app. You can sign in with your email address and start customizing your Bitmoji from there.
Once you have a Bitmoji, I recommend downloading the Bitmoji Chrome extension so you use your Bitmoji on the web. This will allow you to drag and drop your Bitmoji into Google Slides, as outlined in my tutorial here.
11. HOW DO I add another teacher’s Bitmoji?
The first and easiest way to add another teacher’s Bitmoji is to simply share your slides with that teacher and have them add their own. If they’re using the Bitmoji Chrome extension, they can drag and drop their Bitmoji onto the slides with a transparent background.
Another option is to have your teacher pal text or email you their Bitmoji. When sent via text or email, it’ll also come with a white background, so you’ll have to use the remove.bg website to remove it first.
Still have questions? Let me know in the comments below!
PS: HUGE thank you to the folks who have taken the time to answer some of the questions in the comments below. It is much appreciated!